No matter, how stern, robust and well-built, the roof of your home is, it is just one step behind the factors that start deteriorating its condition as soon as it is installed. There are several of them, including rain, sunlight, air, snow, etc. All these factors ensure that you continue to pay attention towards this part of your home. But the problem is that despite maintenance and good care-taking, there comes a time when you have to replace it.
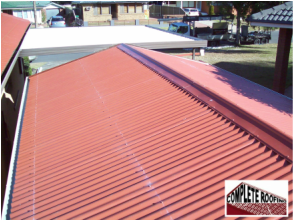
In this post, we will be studying the step-by-step process of sheet metal roofing Sydney or in other words, the process of installing a sheet metal roof.
1 – You need to make sure that the first panel is installed square and all the subsequent panels will follow it.
2 – On exposed fastener panels
You will not require pre-drilling the holes for screws, but pre-drilling the panels will make it easier to get the screw lined straighter.
For this, the best you can do is pre-drilling a stack or around 10 panels at a time. However, you need to ensure that you measure the pre-drilling accurately.
3 – If you have pop-lines for your screws, you need to use blue chalk and not the red one. Red chalk is very difficult to get rid of and can stay for months.
4 – In terms of roofing service Sydney, if you need to cut panels lengthwise, you can score them with a box cutter several times and then bend it back and forth until they break off. The result of this step is that you will get a clean edge.
5 – You can also use tin snips or drill attachment for cutting them.
6 – You need to screw your fasteners in straight and avoid over tightening them. In terms of replacement roof tiles Sydney, the best step you can take is setting the drill tension and testing it on a scrap piece before using.
7 – Before initializing the process of sheet metal roofing Sydney or roofing service Sydney, it is important that you wear protective rubber gloves, protective eye gear and a helmet as well. They will all protect you from sharp metal edges and the gloves will give you a better grip on the metal.
